


Installing Docker on Windows
To install Docker on Windows 10+ or Windows Server 2019+, a Windows application – Docker Desktop – is to be installed (see the corresponding instructions below).
Docker Desktop is an easy-to-install application for your Windows environment that enables you to build and share containerized applications and microservices.
We strongly recommend running Docker Desktop natively on Windows. Running Docker Desktop inside a virtual environment can cause the unpredictable troubles. See more details about the tested configurations here.
- Make sure that the BIOS-level hardware virtualization is enabled in the BIOS settings.
Go to Task Manager > [More details] > Performance tab and check the ‘Virtualization’ feature – it must be enabled.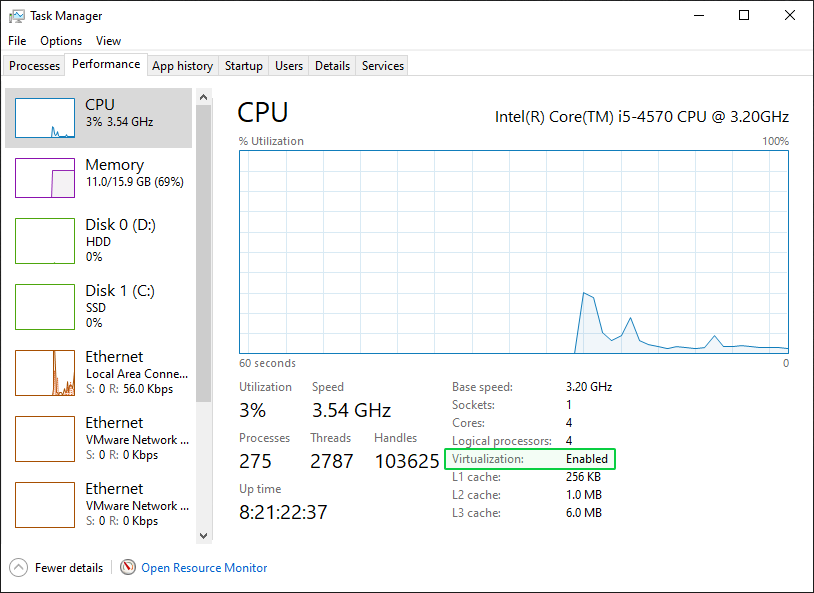
If it’s not enabled, please refer to: How can I enable BIOS-level hardware virtualization?
- Make sure that the virtualization Windows features are enabled in your OS.
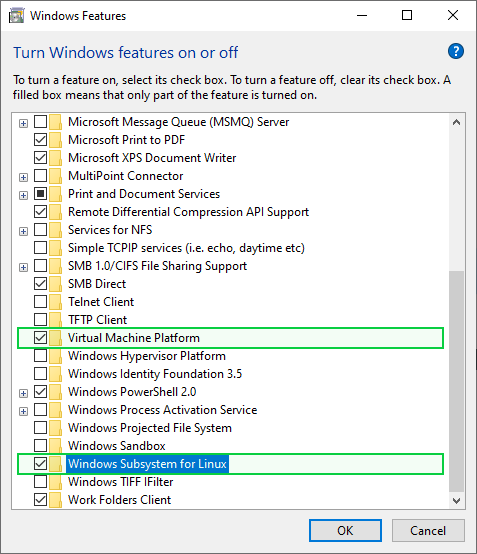
Go to Control Panel > Programs > Programs and Features > Turn Windows features on or off and make sure that the required virtualization features are turned on. Windows may need to restart to apply the changes.We recommend installing Docker Desktop using the WSL 2 backend, and provide the corresponding instructions below. Alternatively, Docker Desktop can be installed using the Hyper-V backend (see more details here).
Windows 10+: Turn the ‘Virtual Machine Platform’ and ‘Windows Subsystem for Linux’ features ON.
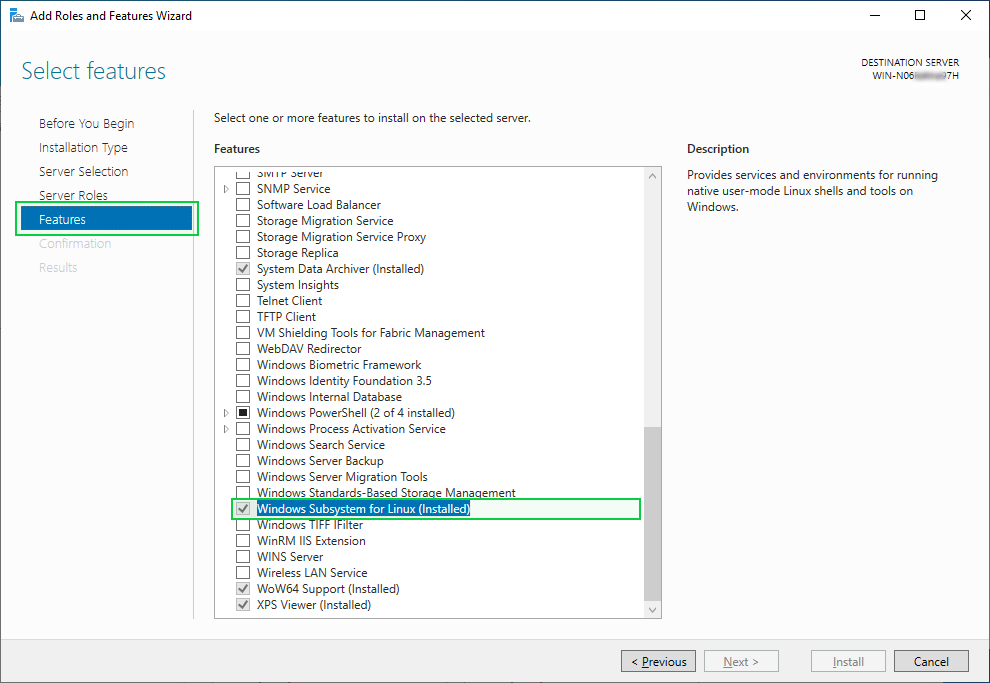
Windows Server 2019+: Turn the ‘Windows Subsystem for Linux’ feature ON.
If some features to be turned on are disabled, perhaps your server does not meet the System Requirements for installing Docker and actiTIME (64-bit processor with Second Level Address Translation (SLAT) is required).
- Download and install the Linux kernel update package (you need to accomplish only the Step 4 from the guide).
- Download Docker Desktop for Windows here.
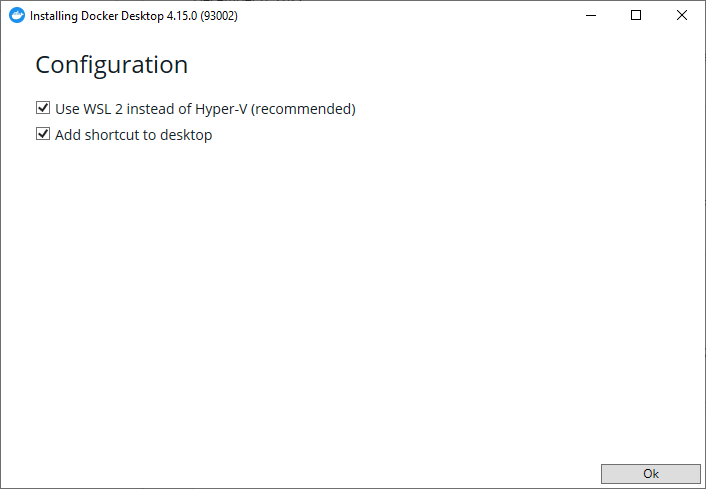
Double-click the downloaded .exe file to run the installer. Follow the instructions on the installation wizard to authorize the installer and proceed with the installation. You may be asked to log out of Windows or restart Windows to complete the installation.While installing, it is recommended to use the default settings – do not forget to select the ‘Use WSL 2 instead of Hyper-V’ checkbox.
- If your admin account is different from your user account, you must add the user to the docker-users group to be able to run the Docker Desktop application later. Run Computer Management as an administrator and navigate to Local Users and Groups > Groups > docker-users. Right-click to add the user to the group. Log out and log back in for the changes to take effect.
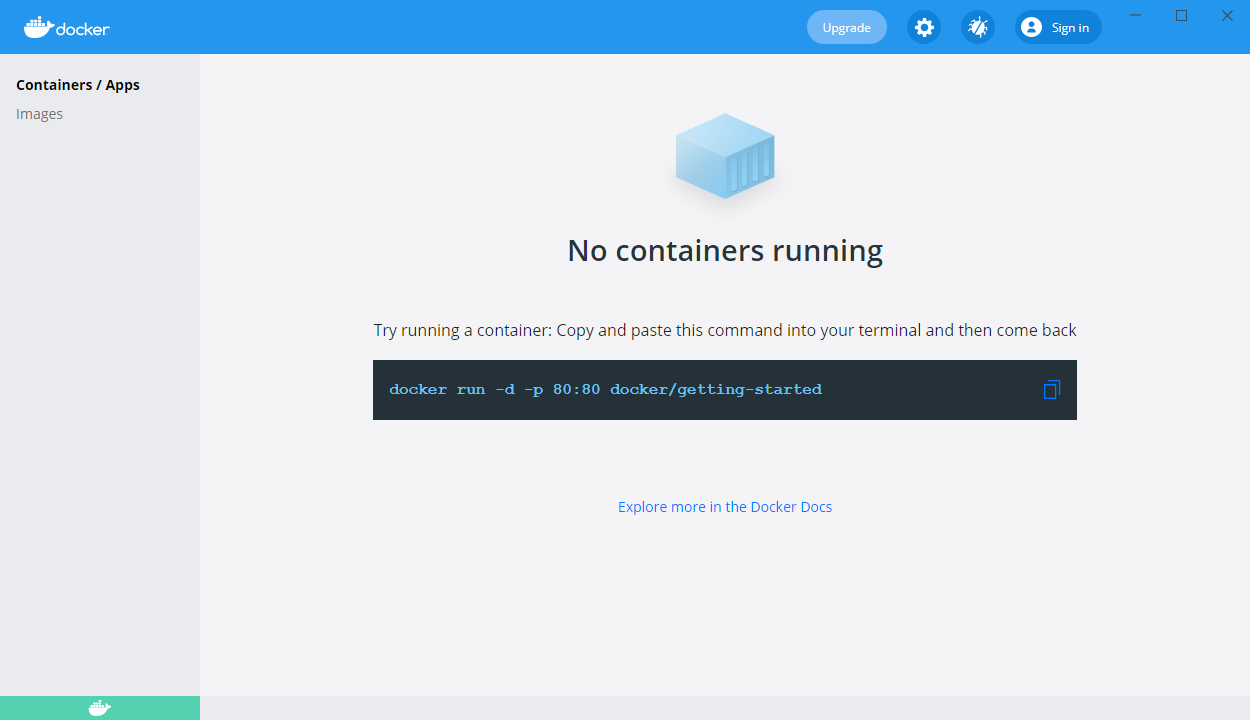
- Start up the Docker Desktop application. After the tutorial, you will see the following screen.
- Configure the resources to be used by Docker on your machine – Docker Desktop must be set to use at least 4GB of your host’s RAM (the ‘memory’ parameter).
- If you use the WSL 2 backend, refer to this guide.
- If you use the Hyper-V backend, refer to this guide.
The more data actiTIME stores, the more RAM Docker Desktop requires.
Installation of Docker Desktop is completed.
Docker Desktop must be running all the time while installing and using actiTIME.
If you come across some problems while installing Docker Desktop, refer to the Troubleshoot and diagnose section on the Docker website.
To be able to manage actiTIME installation, you should also install the Git for Windows application. It provides a BASH emulation and allows users to run the shell scripts (.sh files).
- Download Git for Windows here.
- Double-click the downloaded .exe file and install Git. While installing, it is recommended to use the default settings.
