Managing Projects and Assignments
Before you start tracking time, create a work scope your team will be working on. actiTIME allows you to set up projects and tasks and assign them to users depending on their responsibilities.
Check out our short video on how work assignments are managed in actiTIME.
In actiTIME, the work structure has three levels:
- Top level: Customer
- Middle level: Project
- Lowest level: Task
These are the default names. You can configure any other names for these levels in the General Settings interface.
The ability to manage and assign work scope requires the “Manage Scope of Work” permission. It can be given both to regular users and managers.
Within their assigned scope, regular users can:
- Add new customers, projects or tasks
- Modify or delete customers, projects or tasks
In addition to that, managers can:
- Assign customers, projects or tasks from their scope to their team
To access all customers, projects and tasks available to you, use the Tasks tab. Review the list of customers and projects in the left panel, and see tasks in the right part of the screen:

How to Manage Work Assignments
When you assign work to your team members, they can:
- View all assigned customers, projects, and tasks in the Tasks tab
- Add tasks to their timesheets using task selector or search box
- Track time to tasks assigned to them
- Leave comments in customers, projects, and tasks assigned to them
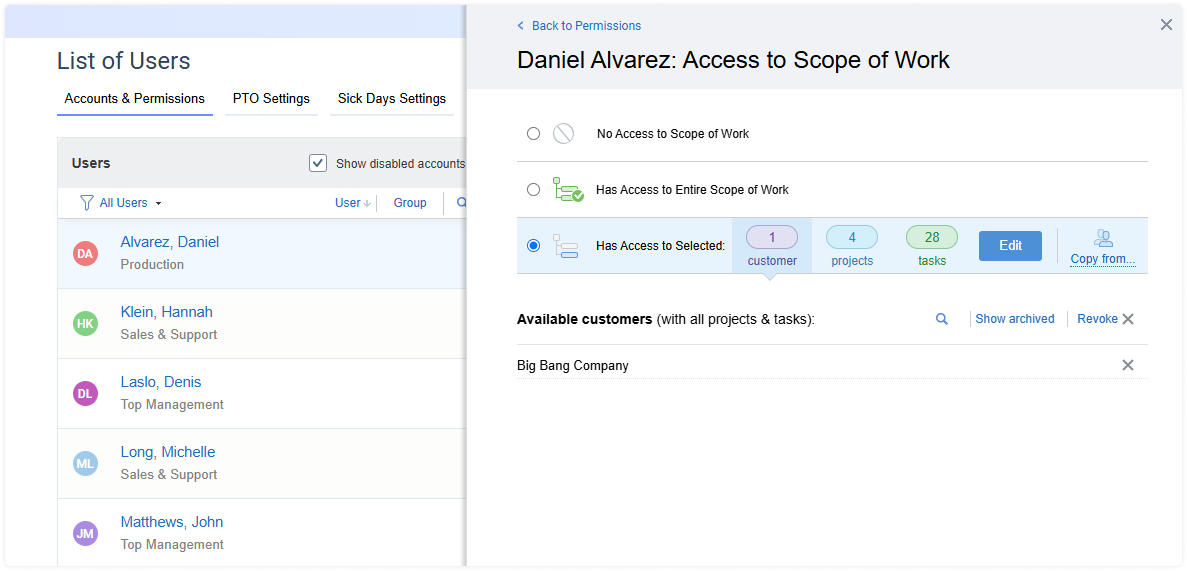
Managers can give work assignments to other users if they have the “Manage Scope of Work” permission and a team assigned to them. To assign work to your team member, take the following steps:
- Go to Users → Work Assignments tab.
- Click the row corresponding to the user in question.
- In the pop-up panel, choose one of the options:
- Click the Edit Assignments button to assign or unassign items
- Copy assignments from another user
- Revoke all existing assignments using the Revoke all option

Tasks can be assigned separately, or within customers and projects. Here’s how it works:
- When you assign a customer, all its existing and future projects are included in the user’s work assignments.
- When you assign a project, all its existing and future tasks are included in the user’s work assignments.
Note that managers can assign customers, projects and tasks only from their permission scope and only to their team members.
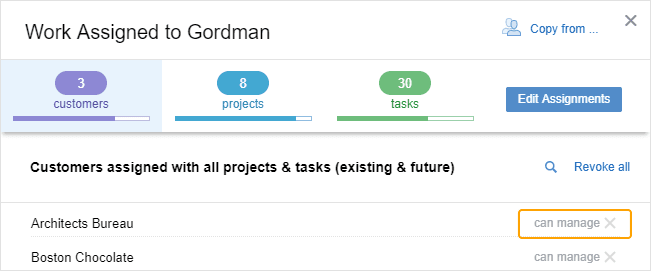
Sometimes, you can see “Can manage” note next to an assigned item. This means that it belongs to user’s permission scope and cannot be edited here. Editing permission scope requires “Manage Accounts & Permissions” right and can be done in the Users → Account Settings tab.
If you don’t need the Work Assignments feature, simply turn it off in the Settings → Turn Features On / Off. All customers, projects, and tasks will become available to all users in the system.
Manage Projects & Customers
- Creating New Customers and Projects
- Managing Existing Customers and Projects
- Exporting Projects and Customers
In actiTIME, the top and middle levels of the work structure are called Customers and Projects, respectively. You can also set up custom names in the Settings → General Settings interface.
Customers and projects are a good way to group tasks together, see aggregated data on reports, and track projects’ progress and profitability.
The Tasks tab is the main interface where you can see and manage customers and projects available to you. They are displayed in the left panel of the screen.
Your available work scope can be broken down into two types:
- Scope you can review. If you have the “Enter Time-Track” permission, you’ll be able to track time for tasks and review properties of any customer or project from your work assignments.
- Scope you can manage. If you have the “Manage Scope of Work” permission, you’ll have the same capabilities, plus the right to edit properties of existing customers and projects and create new ones within your permission scope.
From the left panel, you can:
- Search customers and projects by name
- Filter customers and projects by active / archived status
- Select customers and projects you need to be displayed
- Expand or collapse all items in the list
- Create new items
- Open and modify settings of specific customers and projects

Creating New Customers and Projects
In the Tasks tab, press the + Add New button to create a new customer or project. You can speed up the setup of the work structure using various options.
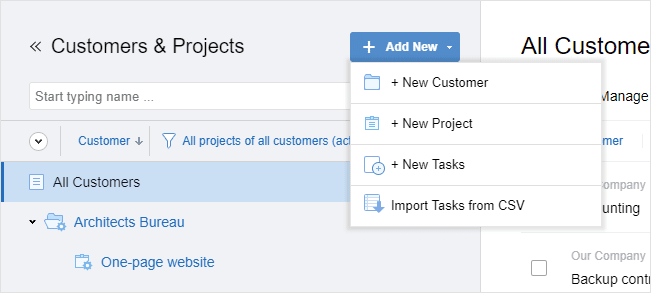
When creating new customers, you can:
- Copy projects and tasks with their descriptions from any active customer you have access to.
- Add users from your team who will enter time for this customer’s tasks.
- Add managers who will be able to modify this customer (available only if you have the “Manage Accounts & Permissions” right).
When creating new projects, you can:
- Copy tasks with descriptions, estimates and types of work from any active or archived project you have access to.
- Create new tasks right away.
- Add users from your team who will enter time for this project’s tasks.
- Add managers who will be able to modify this project (available only if you have the “Manage Accounts & Permissions” right).
You can also create customers and projects in bulk using the option to Import Tasks from CSV.
Managing Existing Customers and Projects
To review and edit an existing customer or project, find it in the left panel of the Tasks tab and click on the cog icon next to it.
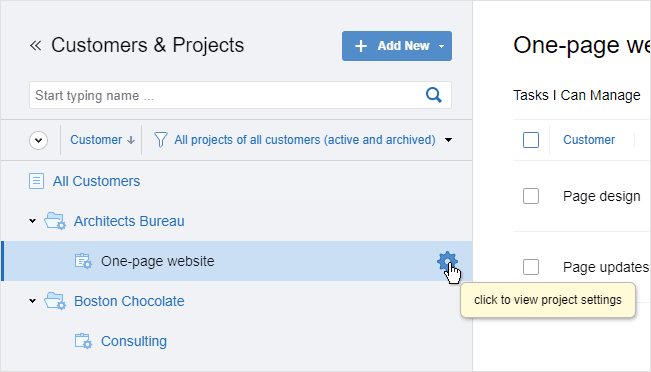
A settings panel will open where you can review and edit the following information:
- Customer or project name
- Status (active or archived)
- Description
- Assigned users who can enter time for this customer’s or project’s tasks
- Managers who have one of the management permissions for this customer or project (available for editing only if you have the right to Manage Accounts & Permissions)
- Allocated budgets

When a customer is flagged as archived, all its projects get archived too. All open tasks of archived customers and projects are automatically completed.
The data of the archived customers and projects remain in the system, but time can no longer be tracked for their tasks.
You can reopen an archived project or customer at any time.
- Description
- Assigned users who can enter time for this customer’s or project’s tasks
- Managers who have one of the management permissions for this customer or project (available for editing only if you have the “Manage Accounts & Permissions” right)
In addition to this information, you will also see:
- Time totals for a project or a customer. Time tracking details for specific tasks are available in the task list on the right side of the interface.
- History of changes with the date, action, and name of the user who applied a change.
- Comments left by other users (you can also post your own here).
Time totals for a project or a customer are also shown. You can see more time-track details by specific tasks in the task list on the right side of the interface.
The Actions menu contains the following options:
- Delete customer or project
- Move project to another customer
Be careful when deleting customers and projects. This action cannot be undone.
When you delete a project with tasks and reported time-track, all this information is deleted permanently. After deletion it will no longer be available in the system reports.
Exporting Projects and Customers
Any user with the access to Tasks interface can export projects and customers into a CSV file. To do that, go to Tasks interface and click the export button in the side panel. Pick the type of data you want to export (projects or customers), and click the export button once more.

How to Manage Tasks
Time is always tracked against the lowest level, which is referred to as “Task” in the default time-tracking hierarchy. To rename this, and other levels of the time-tracking hierarchy, go to Settings → General Settings → Naming.
To see and manage tasks available to you, go to Tasks tab in the header. From there, you can manage two types of tasks:
- Tasks you can review. If you have the “Enter Time-Track” permission, you can track time and review tasks from your work assignments.
- Tasks you can manage. If you have the “Manage Scope of Work” permission, you can track time, create, review and edit tasks within your scope.
In the Tasks tab, you can switch between the list view and Kanban board in the View mode menu below the search box.
In the list view, you can:
- View all tasks or choose tasks from customers and projects in the left panel
- Search tasks by name
- Filter tasks by their workflow statuses and custom fields
- Manage tasks in bulk (use checkboxes)
- Create new tasks
- Modify tasks directly from the list
- Change the sorting order
- Change task statuses
- Export tasks in CSV

On the Kanban board, you can do the same actions as in the list view except for task export.
Create New Tasks
In actiTIME, you can create new tasks in two ways: either create them manually or import from a CSV file.
Create Tasks Manually
From the header menu, go to the Tasks interface. In the left column, click + Add New and select + New Tasks in the drop-down menu. In the pop-up window, you can create or select from the list of customers and projects, create one or more tasks, and assign them estimates, deadlines, priority, and type of work.
To add some of the tasks from the list to your timesheet, select them and hit + Create Tasks.
Import Tasks from a CSV File
If you need to create dozens of tasks but you don’t want to set each of them up manually, this feature will save you some time.
To import tasks from a CSV file, go to Tasks → + Add New → Import Tasks from CSV. Prepare and upload a CSV file according to the following template that you can download in the interface.
When your table is ready, save it in the CSV format and apply UTF-8 or UTF-16 encoding to it. Drag and drop the file in the upload area to import the data.
Please note that duplicated tasks that already exist in actiTIME won’t be imported.
Manage Existing Tasks
Basic task parameters (such as estimates or deadlines) can be edited directly from the tasks list. To access additional details, click on the task name to open the settings panel.
In task settings, you can review and edit the following information:

On this page, you can also review the following:
- Reported time. Regular users have access to their own hours and comments, and total hours for other users. Managers can see details for team members assigned to them. To adjust these settings, go to General Settings → Data Access Restrictions → Allow selected users to see all users’ data in reports, charts and task details.
- Change history. Review change log and see the date, action, and name of the user who applied the change.
- All task comments.
Finally, you can perform certain actions on tasks one by one or in bulk:
- Manage tasks one by one. In the task properties panel, click Actions to choose form the following options:
- Copy task to another project
- Move task to another project
- Delete task
Note that when you delete tasks, this action cannot be undone. All time logs, estimates, comments will be lost.
- Manage tasks in bulk. In the Task interface, whether you use the list view or Kanban board, use checkboxes to choose the task to perform the following actions:
- Copy tasks to another project
- Move tasks to another project
- Assign tasks to users
- Change tasks’ status
- Delete tasks
- Edit task properties in bulk. In the Task interface (list view), use checkboxes to choose the tasks that you want to edit. Click Edit Properties on the bulk actions panel, which will appear at the bottom of the screen. Select and edit the following properties:
- Priority
- Workflow Status
- Custom Field
- Type of Work
- Estimate
- Deadline
Click Apply to save the changes.

Any user with Tasks interface access can also export tasks into a CSV file. To do that, go to Tasks interface and choose the list view mode if you use Kanban board. Set up task filters, adjust display settings and click Export list to CSV under the search box.

It’ll take a few moments, until actiTIME exports chosen tasks according to the display settings into a CSV document.
Custom Fields for Tasks
Custom fields functionality allows you to categorize tasks by some unique parameters not presented in actiTIME by default.
Cost estimate, budget,and ID number are merely a few examples of such additional task categories. However, actiTIME custom fields can be turned into any task grouping options that meet your current business needs and workflows best. And you can apply them to analyze performance data for more specific and non-standard categories of tasks via the Custom Fields Report.

Create New Custom Fields
You can create two kinds of custom fields in actiTIME:
- Text – This custom field type lets you enter data in multiple formats, including text, numbers and percentages.
- Drop-down menu – Use it to build a limited list of task attributes to choose from.
- Number – Use it to enter numerical data in the specified format.
To add any kind of custom field to your account:
- Locate Custom Fields for Tasks in actiTIME List Management
- Click on + New Field
- Write down the name of your custom field and select its type
- In case you’re creating a drop-down custom field, enter the names of alternative task attributes to display in the selector too
- In case you’re creating a numeric field, you need to specify the following parameters:
-
- Decimal places—the number of digits after the decimal point
- Custom label—the measurement unit for your custom field and its position
- The minimum and maximum limits for the numeric value you plan to track

You can add an unlimited number of custom fields to actiTIME. All of them will be available for review in the Custom Fields for Tasks interface, where you may edit or delete any field by clicking on its name or the removal icon, respectively.
Assign Custom Field Parameters to Tasks
Users with the “Manage Scope of Work” permission are authorized to set custom attributes for actiTIME tasks via the Tasks interface. They may do so right in the list of tasks or by clicking on a task’s name and opening its settings.

Besides, custom attributes are available for review to all users via the list of tasks.
To choose which custom fields to display in the Tasks interface, push the Configure list button and select the types of data you want to see on this page:

Afterward, if you want to sort your actiTIME tasks by any particular attribute, just click on the name of the necessary custom field in the list’s header.
Setting Task Priority
Task Priority setting lets you indicate how urgent each task is. You can see this information when assigning tasks, tracking progress, and analyzing team performance.
You can set task priority when creating a new task or editing an existing one. To do so, select a predefined or custom priority depending on the importance of the specific task.

To create, edit, delete, and select task priorities navigate to List Management → Priority. Then, click + Priority Level.
In the opened pop-up window, you can:
- Enter a name
- Select a color

You can view your task priorities in the Timesheet View and the Calendar View. To display them in the Calendar view, select Prioroty via ‘Additional details on the card’.

You can also use priorities to sort and filter data for granular analysis and better planning.
For example, in the Time-Track tab, you can sort tasks by priority after clicking Sort at the top of your timesheet and selecting By priority from the drop-down menu.
In the Tasks tab, you can use the arrow in the Priority column to sort tasks by the highest or lowest priority. To select tasks with the specific priority, click Add filters, select Priority from the drop-down menu, and click Apply. Then select the needed priority and click Apply again.

To use priority as a filter in the Time-Track Report, you need to select to display priority in the Columns menu and Tasks in the Rows menu. Then click +Filter and select the priority levels to apply the filter to and click Apply.

Budget Allocation
In actiTIME, users can set the following three types of budgets for tasks (as well as entire projects or customers):
- The cost budget allows you to estimate and track staff-related expenses associated with a task.
- The billing budget represents the anticipated income that a task will generate based on billable hours and rates.
- The time budget depicts the number of hours you expect to invest in a task.
Note: You can manage cost budgets only if the User Rates & Cost of Work Report is enabled in your actiTIME account. To manage billing budgets, make sure to activate the Hourly Billing Rates, Invoices & P/L Report.

To create a time budget, you need permission to Manage Scope of Work. To create all three types of budgets, make sure you have the Manage Billing Data permission. Then, follow the below steps:
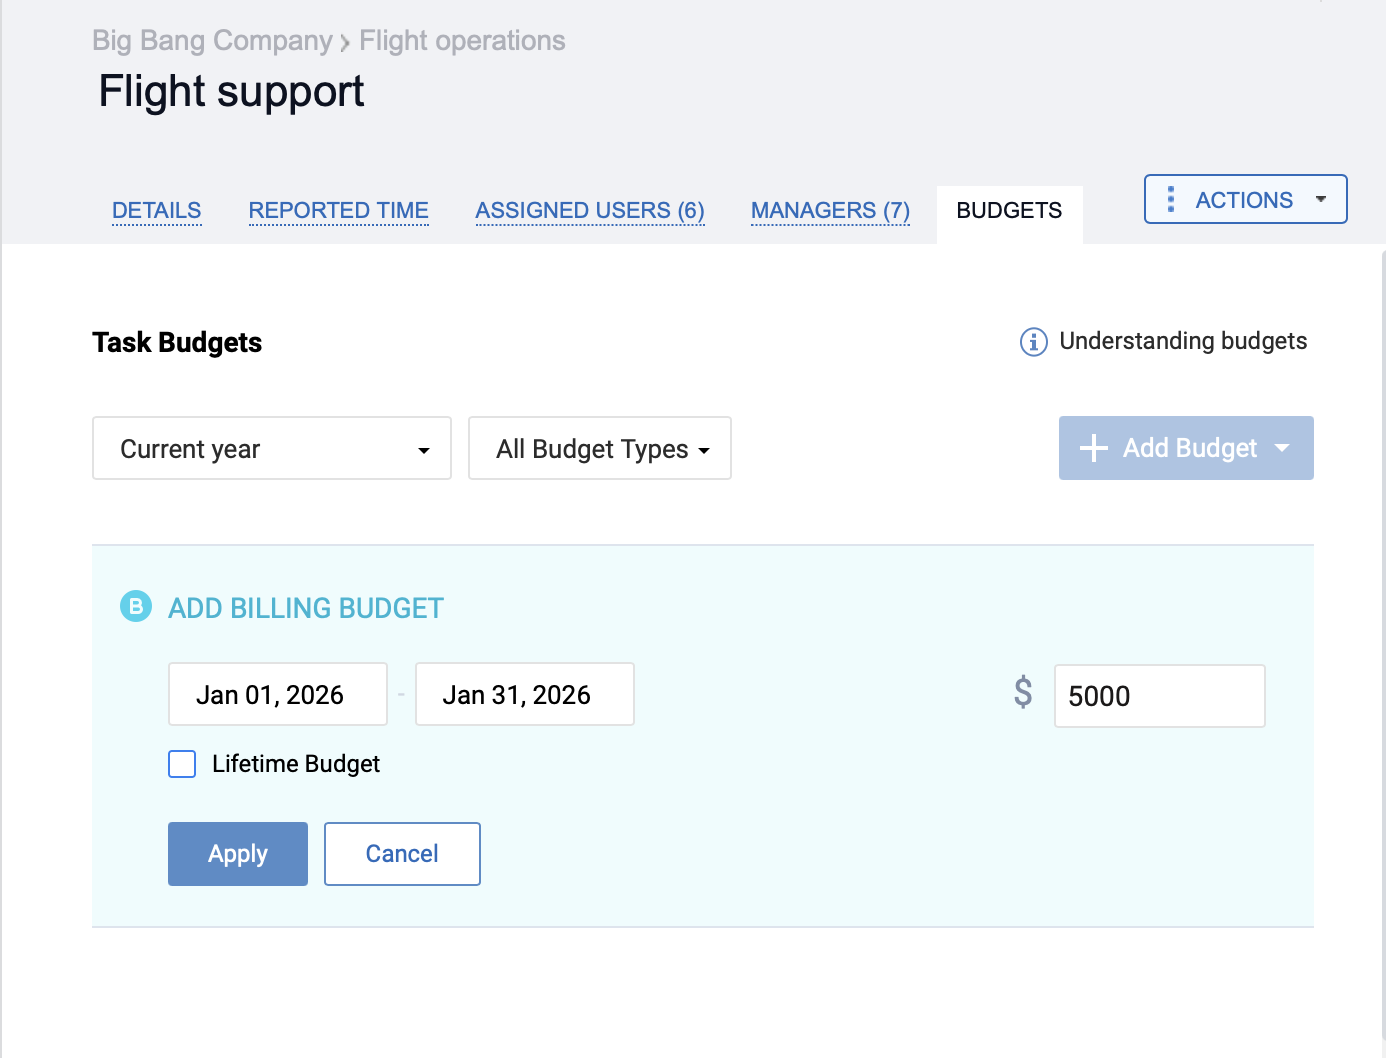
- Go to the Budgets tab, click + Add Budget, and pick the type of budget you want to create.
- In the opened field, set a preferred budgeting period, and allocate the estimated budget amount.
- Once done, click the Save button.

Each of the created budgets comes with a visual progress bar that depicts how much money or time is used vs. the allocated budget and highlights overruns in red.
This progress bar has two view formats:
- As a summary for the entire period
- As a breakdown by days
You can pick one of them by clicking the arrow next to the budget title:

Note: In order to track the use of resources correctly, make sure to assign the cost of work and billing rates to your tasks. In case some of the tasks don’t have those rates assigned, you’ll see an alert below the budget’s progress bar.
To edit a budget, click directly on the assigned amount. In the same way, you can also change the set budget period:
To delete a budget, press the three dots in the upper right corner of the budget field. From there, you can also open a relevant actiTIME report to analyze the recorded data in greater depth. These reports include:
- The Cost of Work Report for cost budgets
- The Billing Summary Report for billing budgets
- The Time-Track Report for time budgets
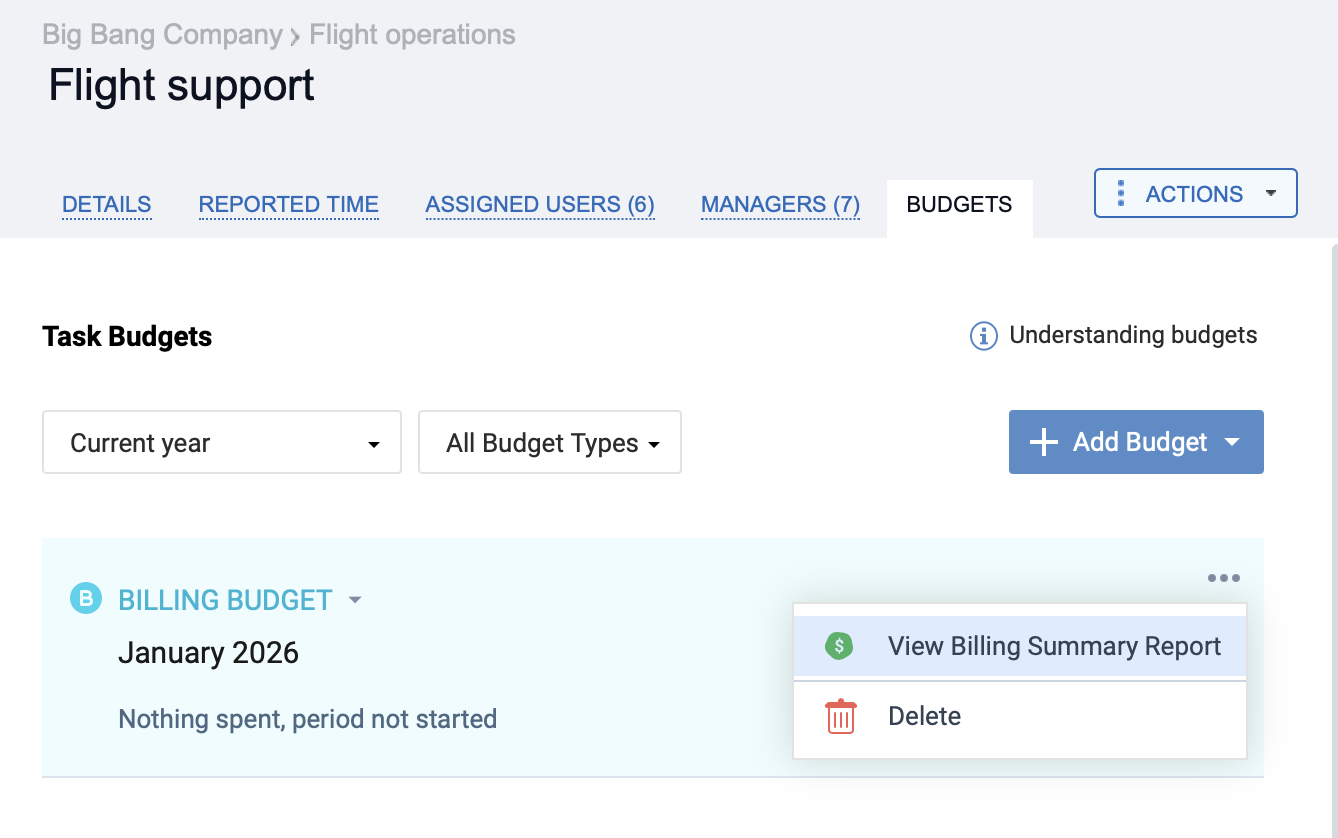
All the created budgets are displayed in the Budgets tab. There, you can sort them by types and assigned periods:

Still have questions? Let us help you.


