Frequently Asked Questions

Find answers on the most popular questions about actiTIME

How do I login in actiTIME?

The online version of actiTIME doesn’t have an openly accessible login form – each registered organization receives a unique corporate access link. You can log in only if already purchased a license or signed up for a trial.

How to Log in to actiTIME when Subscribed

For accessing software for the first time, you need to locate an activation link and an account name that an admin user has sent to you by email after creating your account in the system.

User create account

Follow that link, create a password and click the Login button. To enter the system again, bookmark a short actiTIME URL that has a similar form:

Url actitime

Next time it will direct you straight to the login page. Remember that if you’ve lost the address, you can always ask a colleague or an admin user to share the link with you.

How to Log in to the Trial Version

After signing up for the free trial, you are taken to actiTIME automatically. However, to log in another time, you need to
  • locate a message with an access link, your username and a password in the email box;
  • save the access link, and open it whenever you want to use the time tracker again.
In case of any questions, feel free to contact actiTIME support team

How do I start tracking time with actiTIME?

Basically, to get started with actiTIME, you need to create tasks, add them to your timesheet, and start tracking time. See more details on the initial setup in our User Guide. actiTIME allows you to track time from the web application, actiTIME Mobile app, and actiTIME Timer extension for Google Chrome.

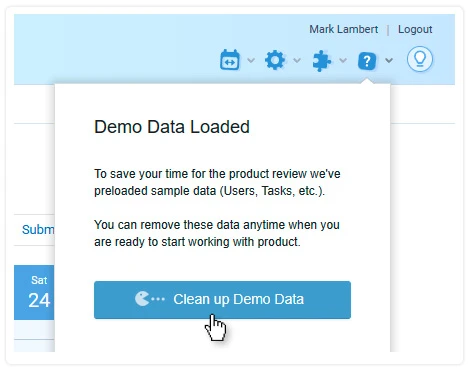
I don’t need preloaded demo data. How do I delete it?

Demo data is preloaded to simplify the review of system functionality. When you are ready to work with your own data, just select “Clean Up Demo Data” in the Help menu:

clean demo data

Only demo data is deleted. If you have created your own customers, projects and tasks or invited new users before deleting the demo data, they will remain in the system.

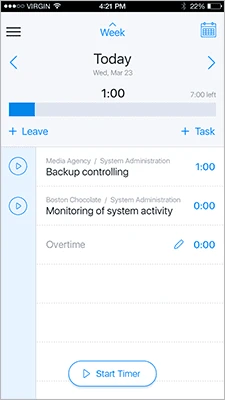
Does actiTIME have a timer feature?

The web version of actiTIME supports manual time entry only. However, the timer functionality is available in:

  1. actiTIME mobile app. Tap once to start a timer when you begin working on a task, and then tap it again to stop it when you’re done. The app will record your time and then sync it with your actiTIME account.
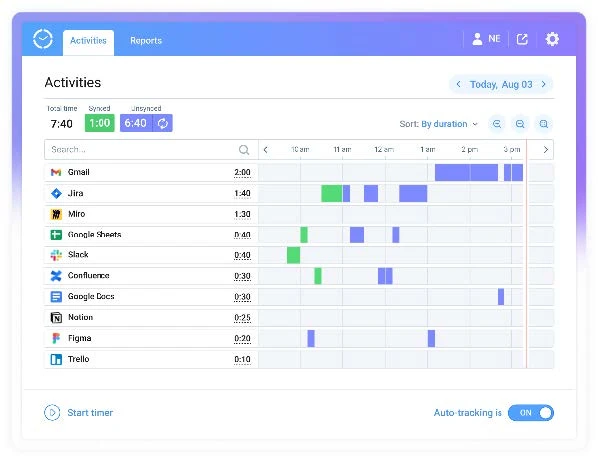
    clean demo data

  2. actiTIME browser extension for Google Chrome. Track time directly from your browser or use the timer button to capture your hours from your favorite web applications like JIRA, GitHub, Google Sheets, and more.

    clean demo data

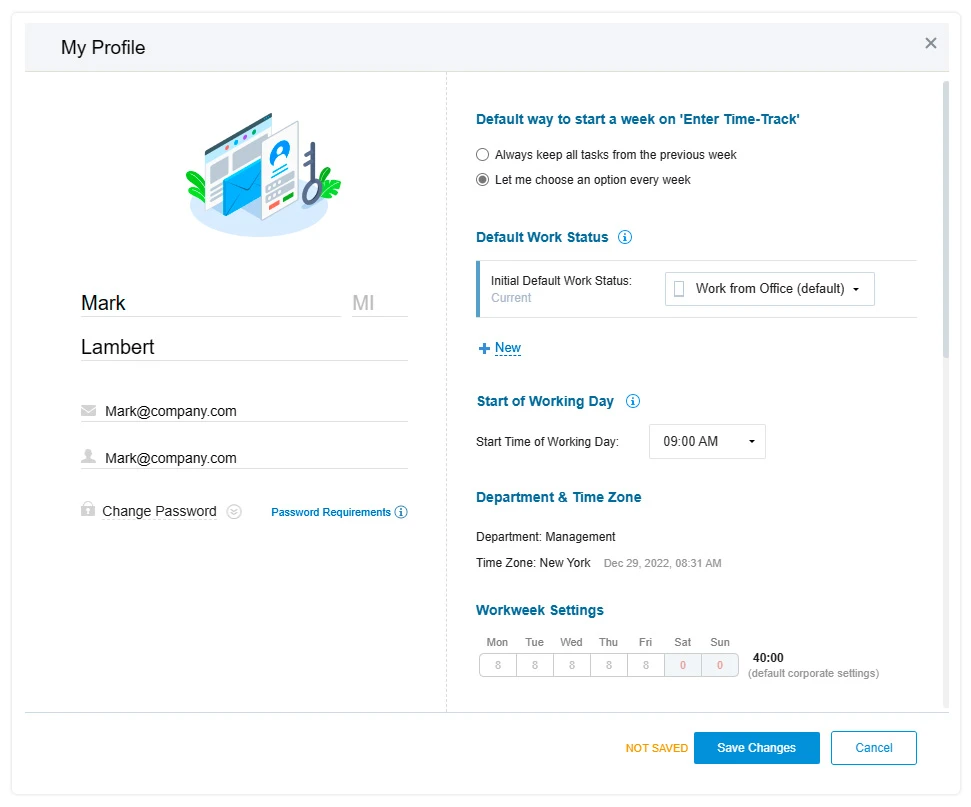
How can I change my password?

To change your password, open My Profile interface by clicking on your name in the top right corner of actiTIME interface. In the left part of the My Profile box you can change your password and other account details.

change your password

My license has expired. What are my next steps?

Even after the license has expired, the administrator can log in to the actiTIME account and extend the license. This can be done in the Settings → Licenses interface. Click on Purchase License and proceed to the purchase. See more details on the purchase procedure in FAQ on our website.

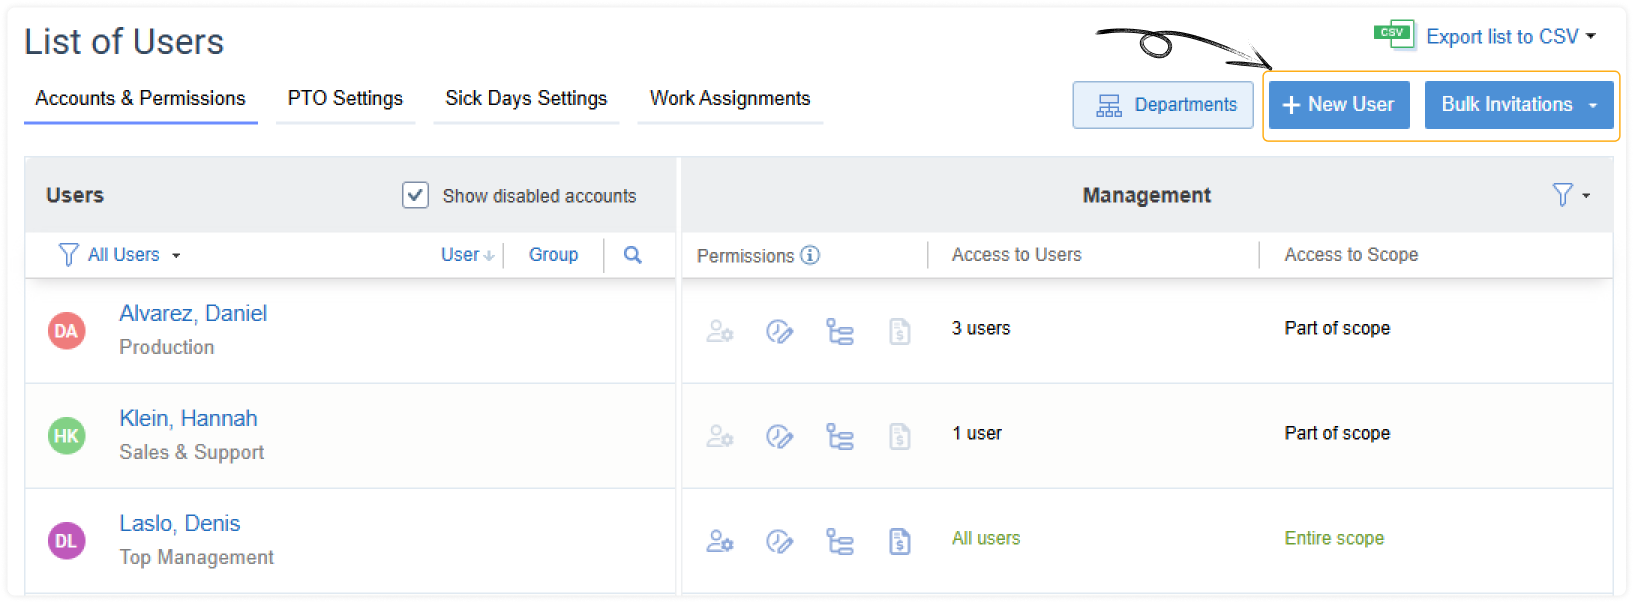
How can I invite my colleagues?

You can invite your colleagues directly from the Help menu ...

change your password

…or from the Users interface, where you can add employees to the system:
  • one by one, via the + New User button;
  • through bulk invitations (i.e., Invite Several Users);
  • or by importing data from a CSV file (i.e., Import Users from CSV)

Get more information in the User Guide.

How do my colleagues access actiTIME?

To access actiTIME, a user needs a login, a password, and a URL of actiTIME installation. For actiTIME Online, necessary login details (login and account activation link) are provided in the invitation email. And if you have actiTIME Self-Hosted, the URL for accessing your account has the following format: http://<IP>:<port> where: IP is the IP address of the computer where actiTIME is installed; Port is the port number of actiTIME installation. If you installed actiTIME from an Auto package (.exe file), you specified it during the installation, and this URL opens when you start actiTIME. For Custom packages (.zip or .tar.gz), it is 8080.
Make sure that this URL does NOT contain ‘localhost’ or ‘127.0.0.1’. If it does, replace it with the IP address of the computer where actiTIME is installed. To find out the IP address:
  • Start Command Prompt (Start menu >> All Programs >> Accessories >> Command Prompt or start "Run" dialog box >> type "cmd" and press Enter).
  • Enter the command "ipconfig" in the Command Prompt and press Enter.
  • In the "IPv4 Address" line, you'll see the IP address of your computer.
Example of a correct URL: http://192.168.100.131:80 Example of an incorrect URL: http://localhost:80

How do I set up an admin user?

Administrative rights in actiTIME are defined by the set of permissions granted to the user. You can check your permissions in the personal profile. To open it, click on your name in the right upper corner of actiTIME interface. Permissions can be granted in User Account Settings interface. To open it, click on the Users tab and select necessary user in the list. Scroll down to the Permissions section and grant necessary ones to the user. Only users with ‘Manage Accounts & Permissions’ can grant permissions to other users and to themselves. To learn more on permissions, please refer to our User Guide.

I ran out of user accounts. What can I do?

No problem! You can free up some user seats, if there are users who stopped using the system, or purchase additional accounts. To free up a user account, just disable one of the accounts you don’t need anymore. Open the Users interface, click on the user’s name, and in the User Account Settings box, turn OFF user’s access to actiTIME. If there are no users whose accounts you can disable, you can purchase more users from the Settings → Licenses menu.
Keep everything on track with the data at hand
Start Using actiTIME