


Managing architecture projects can seem overwhelming at first – after all, there are many aspects you need to consider in order for the planned structure to come together correctly and efficiently. Such a task requires a high level of expertise and a deep understanding of the various phases involved in architectural project management, as well as their individual complexities.
But what are these architecture project phases all about, exactly? In this blog post, we’ll explore each of them and provide a couple of helpful tips on how best to approach your next architecture project.
Stay tuned!
Why architecture project phases matter
Skipping a structured phase process is how architecture projects quietly drift – a client signs off on a floor plan in one conversation, then asks for a different layout after construction drawings are half done, and suddenly the schedule and budget are both wrong. Phases exist to prevent exactly that: each one ends with a specific, agreed-upon deliverable, so decisions get locked in before the next, more expensive phase starts.
This matters more in architecture than in most project-based work: architect fees are typically structured around these phases, contracts reference them, and disputes over “wasn’t that already decided?” usually come down to which phase a decision actually belonged in. Knowing what belongs in which phase protects both the client’s budget and the architect’s time.
7 essential architecture project phases
Whatever you call them – architectural project phases, architecture project stages, or just “the process” – most firms organize work through some version of the same seven steps. You’ll also see this process described as five phases (Schematic Design through Construction Administration, the classic framework used for fee calculations) rather than seven – this guide breaks out Programming and Post-construction as their own steps too, since real projects do the work in both even when it isn’t billed as a separate fee line:
1. Programming
This phase involves a thorough analysis of the project requirements and objectives and requires you to determine the scope of work. By setting the direction for the design and construction teams, it serves as the foundation for the entire project management process.
The goal here is to gather the necessary information and develop a clear understanding of the client’s needs and expectations, budget, site requirements, and project constraints.
Typical duration: 2–4 weeks
Key deliverables: design brief/program document, feasibility study results, site analysis summary
Who’s involved: client, architect, occasionally outside consultants for feasibility studies
Practical tips:
- Identify project stakeholders: Some of them are the client, end-users, architects, engineers, consultants, and contractors. Each stakeholder should have a clear understanding of their roles, responsibilities, and expectations.
- Meet with the client: The programming phase is the time to clarify any vague or ambiguous design details with the client to ensure that the project runs smoothly and that everyone is on the same page.
- Define project goals and objectives: Identify the purpose of the project, success criteria, functional requirements, and performance metrics. This information will guide the work on your project from the start till the end.
- Analyze the site: Evaluate site features like topography, climate, vegetation, and existing infrastructure. Such an analysis will help you detect any opportunities and constraints that shape the design solution.
- Conduct feasibility studies: Evaluate the project’s technical and economic feasibility to determine whether it’s viable and can be completed within the budget and schedule.
- Develop a design brief: This document summarizes the project goals, objectives, and requirements. It serves as a reference document for the project team to ensure that the design solution aligns with the client’s expectations and needs.
Get a free creative brief template here. 👈


2. Schematic design
This phase implies the creation of an initial design concept and offers the first opportunity for the client to see their project taking shape. Architects will typically produce a range of design options for the client to consider, based on the project’s specific requirements and constraints. This process involves balancing trade-offs between optimizing the functionality of the space whilst maintaining the budget and keeping the project on track.
Typical duration: 4–8 weeks
Fee share: roughly 15% of the total design fee
Key deliverables: concept sketches, preliminary floor plans and massing, a rough cost estimate
Who’s involved: architect, client (through several feedback rounds)
Practical tips:
- Conceptualize your design: The schematic design process is all about exploring different options and possibilities. So, sketch out different ideas, propose several design options, and create rough drawings and models for them. Consider different materials, colors, textures, and other elements that can be incorporated into the design.
- Get feedback from clients: It’s essential to involve clients in the design process to guarantee that their preferences are incorporated into the project. Feedback from clients helps architects understand their expectations and ultimately meet their needs.
- Refine the design: Based on feedback from the client, the architect can make necessary modifications to the design (e.g., adjustments to the design’s form, layout, and materials). The refined design must be able to meet the client’s needs, function efficiently, and still remain within budget constraints.
- Use an iterative approach: It requires you to repeat the first three steps until a satisfactory design concept is achieved. Such an approach helps to fine-tune the design to multiple requirements, eliminate errors, and ensure that the project stays on track from the beginning till the end.
Find out more about the iterative (aka agile) approach to project management here. 👈

3. Design development
This phase involves further refinement and development of the design concept that was established during the schematic design phase. The purpose of this phase is to create a more detailed and comprehensive design that takes into account all technical and functional aspects of the project.
Typical duration: 4–6 weeks
Fee share: roughly 20% of the total design fee
Key deliverables: detailed floor plans and elevations, material and system selections, 3D models or renderings
Who’s involved: architect, structural/MEP engineers, client
Practical tips:
- Review the preliminary design: Re-evaluate the design concept developed in the schematic design phase to confirm that it’s feasible and in line with the client’s requirements, budget, and schedule. Additionally, revisit the results of your site analysis, code requirements, and other technical information needed to refine the design.
- Layout the indoor and outdoor spaces: Position walls, doors, windows, and other elements to maximize functionality and aesthetic appeal. Consider factors like traffic flow, accessibility, and safety.
- Make the structural and MEP design: Think through such structural elements of the building as walls, floors, and roof systems, as well as the mechanical, electrical, and plumbing systems that will be installed. They must be organically integrated into the design to ensure that they work effectively and efficiently.
- Pick materials: Take into account such factors as durability, cost, environmental impact, and aesthetic design.
- Create a 3D model: Virtual representations of the building allow you to visualize the space and explore different design possibilities. They are the backbone of the design development phase and can be generated using a variety of software tools that range from sophisticated, industry-standard software to simpler, more user-friendly packages.
- Render your design: Renderings provide stakeholders and clients with a realistic representation of spaces, materials, and lighting. Sure, the process takes time but is worth it in the end as it helps to better communicate your design to clients or colleagues who can give feedback to refine the design.
Explore the best software tools for architecture design here. 👈
4. Construction documents
“The Construction Documents Phase is the largest of all the phases for the architect and will be about 40% of the architect’s work and fees. Although the percentage may vary a little from project to project or with Different Architecture Firms.” – Fontan Architecture
This phase requires a collaborative effort between architects, engineers, and other stakeholders involved in the project. They must work together to produce a comprehensive set of documents that include detailed plans, elevations, sections, schedules, and specifications.
The construction documents outline all aspects of the building, from the structural framework to the finishes, such as paint, flooring, and lighting. They serve as a communication tool between the design team and construction teams to ensure that the construction meets the client’s expectations and is in accordance with the local building codes and regulations.
The construction documentation phase is also a time when material specifications and procurement methods are determined and the final cost estimates are established.
Typical duration: 8–12 weeks
Fee share: roughly 40% of the total design fee – the quote above from Fontan Architecture lines up with this
Key deliverables: full construction drawing set, technical specifications, permit-ready documentation
Who’s involved: architect, engineers, code consultants, permitting authorities
Practical tips:
- Create detailed construction drawings: They must include architectural, structural, mechanical, and electrical plans that provide all the necessary information for the contractors to carry out the work. The drawings should be clear, concise, and easy to understand. Plus, they should be created in a format that can be easily shared with the construction team.
- Develop technical specifications: Provide detailed instructions on the materials, equipment, and methods to be used in the construction process. This will help to keep your project in line with all applicable codes and regulations.
- Coordinate contractors and subcontractors: Work closely with the contractors to review the plans and specifications, answer questions, and provide guidance as needed. The goal is to make sure that all parties are aware of the set project requirements and timelines.
- Obtain necessary permits: Get approval from local authorities and regulatory agencies. This may include building permits, environmental approvals, and other necessary permits depending on the nature of the project.
- Conduct a final review: Double-check if the created documentation meets the set project requirements and industry standards to avoid costly mistakes.
Choose your ideal document-sharing software here. 👈
5. Bidding
Bidding is the process of soliciting and evaluating proposals from contractors and vendors for various aspects of the project. During this phase, the project owner or manager puts out a request for proposal (RFP), and the interested parties then submit their proposals, which are reviewed and evaluated based on various factors, such as cost, experience, qualifications, and references.
A well-managed bidding process helps to identify the best contractors and vendors for the project, establish clear performance expectations, and prevent costly delays and disputes down the line.
Typical duration: 2–4 weeks
Fee share: roughly 5% of the total design fee
Key deliverables: reviewed contractor bids, a selected contractor, a signed construction contract
Who’s involved: architect, project owner, contractors and vendors
Negotiated vs. competitive bidding
Not every project puts bids out to the open market. In negotiated bidding, the owner selects a contractor directly (often one they’ve worked with before) and negotiates price and terms one-on-one – faster, and useful when trust and schedule matter more than getting the lowest number. In competitive bidding, multiple contractors bid against each other on the same set of documents, and the owner picks based on price, qualifications, or a mix of both – slower, but it tends to surface the most competitive pricing for projects where budget is the deciding factor.
Practical tips:
- Define the evaluation criteria: They will serve as the basis for comparing and evaluating the bids. They should be specific, measurable, and aligned with the project’s objectives, quality standards, and budget.
- Create a comprehensive RFP: It must provide potential contractors with all the information they need to submit competitive bids. The key things to cover here are the project scope, requirements, evaluation criteria, timelines, and budget.
- Reach out to multiple contractors: To get the best possible bids, it is recommended to reach out to multiple contractors with a proven track record of delivering successful projects. This way, you can rest assured that the project receives competitive bids, and the selected contractor has the necessary skills, experience, and resources to carry out the plan.
- Establish a clear and transparent bidding process: You need to provide all bidders with a level playing ground and ensure they get equal access to critical information and have the opportunity to ask questions. Ultimately, this will help you choose the best-suited candidate from the available ones.
- Evaluate bids thoroughly: To select the best bidder, it is important to evaluate the bids thoroughly according to the pre-defined evaluation criteria. So, review the bids carefully, verify that they meet the project requirements, and assess the bidder’s credentials and experience.
Use actiTIME to track project budgets against your original scope, so you head into the bidding process with clean numbers to evaluate proposals against – click here to learn more about defining a project’s scope of work. 👈
6. Construction administration
This phase is all about the active realization of the planned structures in line with the set specifications and expectations. It requires architects to monitor project progress and check for any discrepancies that may have arisen during the construction process.
Typical duration: 6–18 months (runs concurrently with construction itself)
Fee share: roughly 20% of the total design fee
Key deliverables: site visit reports, RFI responses, punch list, certificate of substantial completion
Who’s involved: architect, contractor, subcontractors, owner
Practical tips:
- Stay available to address contractors’ concerns and questions: This helps to improve communication and quickly resolve any issues that may hinder the construction process. Moreover, when architects are promptly available, they can give quick feedback to ensure that the contractors make the necessary adjustments promptly.
- Checking project progress: Architects must keep an eye on the work done on-site to identify any issues with project realization. This step helps to maintain quality control, ensuring that the structure meets initial requirements.
- Scrutinize contractors’ invoices to verify work completion: Regular reviews of contractor’s invoices help to understand if the payments are reasonable and if the construction process follows the design specifications. Such reviews assist in establishing accountability and let you see if the project is on a clear timeline or if the work is delayed.
Find out how actiTIME can help you stay on top of project progress here. 👈
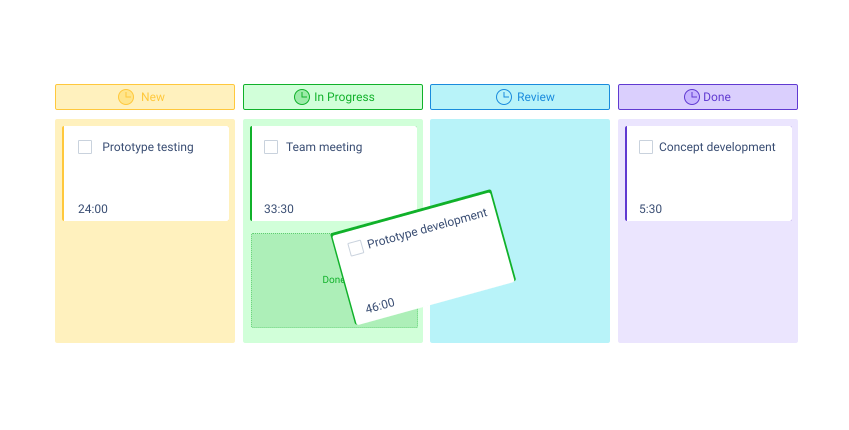
Manage team workloads and track project progress using the Kanban board in actiTIME.
7. Post-construction
The architect’s job doesn’t end when the contractor demobilizes. Post-construction covers everything from project handover through the warranty period – making sure the building performs the way it was designed to, not just the way it looked on the drawings.
Buildings typically carry a one-year warranty for repairs. The project architect commonly checks back in around the ten-month mark to remind the owner of the warranty deadline and flag any issues before it expires. Many firms also run a post-occupancy evaluation (POE) around six to twelve months in – a structured look at how the building actually performs, gathered from occupant feedback, to close the loop between the original design goals and the finished result.
Typical duration: ~1 year (warranty period), with POE typically conducted 6–12 months after occupancy
Fee share: usually folded into the construction administration fee rather than billed separately
Key deliverables: as-built drawings, warranty documentation, post-occupancy evaluation report
Who’s involved: architect, owner/building occupants, contractor (for warranty-covered repairs)
Architect fee breakdown by phase
Fee splits vary by firm and project, but the ranges below are a reasonable industry benchmark for a full-service project – and they explain why Construction Documents eats up more of the architecture project schedule and budget than any other phase.
| Phase | Share of total design fee |
|---|---|
| Schematic Design | ~15% |
| Design Development | ~20% |
| Construction Documents | ~40% |
| Bidding | ~5% |
| Construction Administration | ~20% |
These five phases account for the full design fee between them; programming and post-construction usually aren’t broken out as their own line items – programming is often billed as an additional service, and post-construction work is typically folded into the construction administration fee. Actual splits shift based on project type and firm, so treat this as a planning benchmark for your own project budget, not a fixed formula.
10 Factors that make an architecture project successful
Every great architecture project balances the same ten factors, whatever the brief:
- Creativity – original thinking that pushes past the obvious solution
- Functionality – the space works for how people actually use it
- Efficiency – strong results without wasting materials, time, or budget
- Safety – designed for the risks a building and its occupants will actually face
- Quality – construction that matches the ambition of the design
- Durability – built to hold up under real weather and real use over time
- Sustainability – lower energy costs and lower impact over the building’s life
- Usefulness – a purpose beyond looking good in photos
- Accessibility – designed so people of all ages and abilities can actually use the space
- Beauty – because a building people don’t enjoy looking at is still a design failure
Manage your architecture design projects the easy way
Managing a grand architecture project is no easy feat! Tight deadlines, myriads of bills to track, and hundreds of tasks that constantly need attention often leave architects sleepless at night and cause never-ending headaches.
That’s why actiTIME is such a lifesaver for architects everywhere.
This ingenious software takes the stress out of project management and helps keep everything running smoothly like clockwork. It helps to take care of every little detail and make sure nothing falls through the cracks while giving you plenty of time to focus on evolving your designs and making your next architectural feats a reality.
So, what are you waiting for? Put actiTIME in your toolbox today and get control over all architecture project phases without breaking a sweat!
FAQ
How long does the design process take before construction starts?
Adding up the phases from Programming through Bidding – roughly 20 to 34 weeks combined – most projects spend somewhere between 5 and 8 months in the design and pre-construction stage before Construction Administration (and the build itself) begins. That range assumes reasonably prompt client feedback and permitting; slow approvals or design changes can stretch it well beyond that.
Why does Construction Documents cost more than Construction Administration, even though CA takes longer?
Fee share tracks effort and risk concentration, not calendar time. Construction Documents packs the most technically demanding, liability-heavy work – coordinating architect, engineers, and code consultants into one permit-ready set – into 8 to 12 weeks, which is why it claims 40% of the fee. Construction Administration stretches over 6 to 18 months, but the architect isn’t working on it full-time throughout – site visits, RFI responses, and punch-list reviews happen periodically rather than continuously, which is why its 20% share doesn’t scale with its longer calendar duration.
Why does Construction Administration have such a wide timeline range (6–18 months)?
Every other phase in this guide has a fairly narrow range because it’s largely within the architect’s own control – a few weeks of drafting or client review. Construction Administration is different: its length tracks how long the actual construction takes, which depends on project size, contractor performance, and site conditions – factors the architect doesn’t control directly. A small renovation might wrap up construction in under six months; a multi-building commercial project can run past a year and a half, with the architect’s CA phase running right alongside it.